
Beginner Photography Tips for Taking Better Photos
A better photo rarely comes from a more expensive camera first. It usually comes from a clearer choice: where to stand, what to include, what to leave out, and how to use the light already in front of you.
That is good news for anyone starting out. You do not need a studio, a long lens, or a complicated editing routine to improve. You need a few habits that make every shot more intentional. These beginner photography tips will help you take sharper, cleaner, more interesting photos with a phone, mirrorless camera, DSLR, or compact camera.
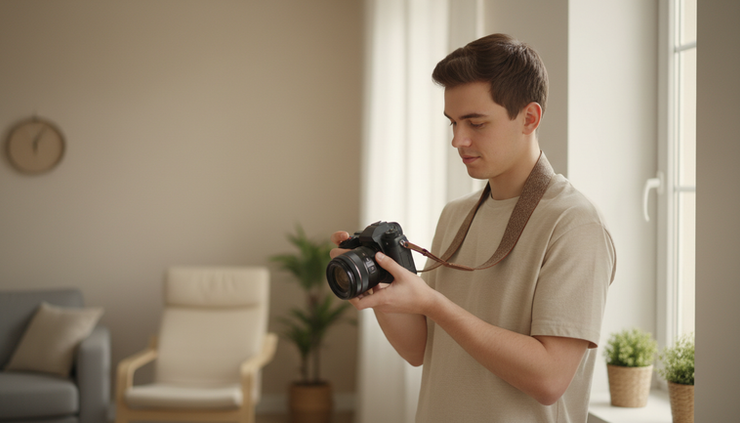
Learn what your camera is trying to do
Every camera, including a phone, tries to solve the same basic problem: collect enough light to make an image. When the photo is too dark, too bright, blurry, or grainy, the camera is usually struggling with light, movement, or both.
You do not need to memorize every setting on day one. Start with the three controls that shape almost every photo.
Aperture controls background blur
Aperture is the opening in the lens. It affects how much light enters the camera and how much of the scene looks sharp from front to back.
A small f-number, such as `f/1.8` or `f/2.8`, creates more background blur. This works well for portraits, food, flowers, and details where you want the subject to stand out.
A larger f-number, such as `f/8` or `f/11`, keeps more of the scene sharp. This works well for landscapes, street scenes, travel photos, and group shots.
If you use a phone, portrait mode mimics this effect with software. It can look good, but check the edges around hair, glasses, leaves, and hands. Phones sometimes blur the wrong areas.
Shutter speed controls motion
Shutter speed is how long the camera sensor is exposed to light. A fast shutter speed freezes motion. A slow shutter speed allows motion blur.
Use a faster shutter speed for:
Kids running
Pets moving
Sports
Birds
Handheld photos in low light
Use a slower shutter speed when you want motion to show, such as water flowing over rocks or car lights streaking at night. For very slow shutter speeds, use a tripod or place the camera on a steady surface.
A simple rule helps: if your subject is moving, raise the shutter speed before you change anything else.
ISO controls brightness and grain
ISO makes the camera sensor more sensitive to light. A lower ISO, such as `100` or `200`, gives cleaner images. A higher ISO helps in dark rooms but can add grain or digital noise.
Modern cameras and phones handle higher ISO better than older models, so do not fear it. A slightly grainy sharp photo is often better than a clean blurry one.
For beginners, try this simple starting point:
Situation | Setting to try first |
Bright outdoor light | Low ISO, faster shutter speed |
Indoor window light | Medium ISO, wide aperture |
Fast movement | Faster shutter speed, higher ISO if needed |
Landscape or city view | Smaller aperture, low ISO, steady camera |
The goal is not to use manual mode all the time. The goal is to understand what your camera changes when the photo does not look right.
Make composition a habit before you shoot
Composition is how you arrange the photo. It decides what the viewer notices first, where their eye travels, and whether the image feels calm, messy, balanced, or dramatic.
Before taking a photo, pause for two seconds and ask one question:
What is the subject?
If the answer is not clear, the photo will likely feel cluttered. Move closer, change your angle, wait for a cleaner background, or remove distractions from the frame.

Use the rule of thirds as a starting point
Most cameras and phones let you turn on a grid. The rule of thirds divides the frame into nine equal rectangles. Place your subject near one of the lines or intersections instead of always placing it in the center.
This often makes the photo feel more natural. A person looking to the side, for example, usually needs space in front of their face. A landscape often looks stronger when the horizon sits on the upper or lower third instead of cutting the photo in half.
The rule of thirds is not law. Centered composition can look strong, especially with symmetry, reflections, doorways, roads, or portraits. The grid simply helps you stop placing the subject in the middle by habit.
Watch the edges of the frame
Beginners often focus only on the subject and miss what is happening near the edges. That is where distractions sneak in.
Before you press the shutter, scan the borders of the photo. Look for:
Tree branches growing out of heads
Bright trash cans or signs in the background
Cropped fingers, feet, or tops of heads
Tilted horizons
Random objects that pull attention away
Small fixes make a big difference. Step left. Get lower. Wait for someone to walk out of the frame. Turn the camera vertical instead of horizontal. These choices take seconds and cost nothing.
Get closer than feels natural
Many beginner photos are taken from too far away. The subject is technically in the frame, but it does not fill enough space to feel important.
Try taking three versions of the same scene:
A wide photo that shows the setting
A medium photo that shows the subject clearly
A close photo that captures detail
For a farmers market, that could mean a wide photo of the stalls, a medium photo of a vendor arranging produce, and a close photo of water droplets on tomatoes. This gives you variety and teaches you how distance changes the story.
Use light instead of fighting it
Photography is writing with light, but that does not mean you need perfect light. You need to notice its direction, strength, and color.
The easiest light for beginners is usually soft light. It wraps around a subject and creates gentle shadows. You can find it near a window, under open shade, on cloudy days, or during the hour after sunrise and before sunset.
Harsh midday sun can still work, but it creates strong contrast. Faces may have deep eye shadows. White shirts may look too bright. Backgrounds may feel busy and bright. If a photo looks harsh, move the subject into shade or turn them so the light hits from the side instead of straight overhead.

Face your subject toward the light
For portraits, food, crafts, pets, and still life photos, place the subject near a window and turn it toward the light. You will often get bright eyes, better color, and softer shadows.
If the shadows look too dark, place a white poster board, foam board, or light-colored wall opposite the window. This bounces light back into the shadow side. It is a simple trick, but it can make a photo look cleaner right away.
Avoid mixed light when you can
Mixed light happens when different light sources have different colors. A room may have blue daylight from a window and yellow light from a lamp. Cameras can struggle to make skin tones and whites look natural in that situation.
When possible, use one main light source. Turn off overhead lights if window light is strong. Move away from neon signs if they make skin look green. If you are photographing food at a restaurant, place it near a window instead of directly under warm ceiling lights.
Learn to read shadows
Shadows are not a problem by default. They give shape and depth. A photo with no shadows can look flat.
Look at where shadows fall before you shoot. Side light creates texture, which is great for brick walls, landscapes, hands, fabric, and food. Backlight can create glow around hair, leaves, steam, or glass. Front light is simple and bright, but it can feel less dimensional.
Once you start seeing shadows, you will stop blaming your camera for problems that come from the position of the light.
Focus on sharpness where it matters
A photo does not need to be sharp everywhere. It needs to be sharp where the viewer expects it.
For portraits, that usually means the eyes. For food, it may be the front edge of the dish. For products or handmade items, it may be the most detailed part. For landscapes, it may be the area that gives the scene depth and structure.
Most blurry photos come from one of three causes: missed focus, camera shake, or subject movement.
Choose the focus point yourself
Auto focus is useful, but it can pick the wrong thing. If the camera focuses on the background instead of the person, the photo fails even if exposure and composition are good.
On a phone, tap the subject before shooting. On a camera, learn how to move the focus point or use single-point autofocus. For still subjects, place the focus point directly on the most important detail.
For people and pets, use eye detection if your camera has it. It is one of the most helpful modern features for beginners.
Hold the camera steady
Good technique helps more than people expect. Keep your elbows close to your body. Stand with your feet steady. Press the shutter gently instead of jabbing at it.
If light is low, brace yourself against a wall, railing, table, or tree. With a phone, hold it with both hands and use the volume button as the shutter if that feels steadier.
When shooting at night, use a tripod, small tabletop stand, or stable surface. Even a two-second timer helps because it keeps your finger press from shaking the camera.
Take more than one frame
Professionals often take several frames of the same moment because small changes matter. Someone blinks. A hand moves. Focus misses slightly. Wind moves hair or flowers.
For beginners, taking two or three frames gives you a better chance of getting a clean result. This is especially useful with kids, pets, street scenes, and group photos.
Do not spray hundreds of photos without thinking. Shoot with intention, but give important moments a little breathing room.
Edit lightly and learn from every photo
Editing should make the photo closer to what you saw or felt when you took it. It should not rescue every weak image. Start with simple adjustments before using heavy filters.
Basic edits can improve most photos:
Straighten the horizon
Crop extra empty space
Adjust exposure so the image is not too dark
Lower highlights if bright areas lose detail
Lift shadows if important areas are too dark
Add a small amount of contrast
Correct white balance if the color looks too blue or yellow
A light edit often looks better than a dramatic one. Skin should still look like skin. Grass should not glow neon. Skies should not look painted unless that is your clear creative goal.

Review your photos with one clear question
After a photo walk or family event, pick ten images and study them. Do not only ask whether you like them. Ask why they work or why they do not.
Look for patterns:
If you notice this | Try this next time |
Photos feel cluttered | Move closer or simplify the background |
Faces look dark | Turn the subject toward better light |
Images look blurry | Use faster shutter speed or steadier hands |
Colors look strange | Avoid mixed light or adjust white balance |
Photos feel flat | Use side light, shadows, or a lower angle |
This kind of review turns every shoot into practice. You will start spotting problems before they happen.
Build small practice projects
Random practice helps, but small projects help more. They give you a reason to look closely and repeat the same skill in different situations.
Try one of these for a week:
Photograph the same window light at different times of day
Take one strong photo of your morning coffee each day
Practice portraits using only shade
Make ten photos using reflections
Photograph one color everywhere you find it
Take a walk with only vertical photos
Shoot close-ups of textures around your home
A project gives you limits, and limits make choices easier.
Keep your gear simple while you build your eye
New photographers often wonder what to buy next. A better lens or camera can help, but gear cannot replace timing, light, and composition.
Before buying anything, learn the camera you already have. Read the basic menu options. Turn on the grid. Learn exposure compensation. Practice moving the focus point. Find burst mode, timer mode, and white balance. These tools often solve more problems than a new purchase.
If you use a phone, clean the lens before shooting. It sounds too simple, but fingerprints can make photos look hazy. Tap to focus, lower exposure slightly for bright skies, and avoid zooming too far with digital zoom, which can reduce image quality.
If you use a camera, start with one lens for a while. A standard zoom or a prime lens can teach you a lot. Too many choices can slow learning because you end up changing gear instead of solving the photo.
The best upgrade for many beginners is not a camera body. It is better light, a steadier hold, a simple tripod, or more time spent practicing.
A simple path to better photos
Better photography grows from attention. Notice the light. Choose a subject. Clean up the frame. Focus carefully. Take the photo, then study what worked.
The fastest way to improve is to practice one skill at a time. Spend a day thinking only about light. Spend another day working on composition. Then practice sharpness, motion, or editing. Small skills stack up quickly when you use them often.
Take your camera or phone somewhere familiar today. Make five thoughtful photos of ordinary things: a window, a chair, a tree, a meal, a person you care about, or a quiet corner of your street. Change your angle, watch the light, and shoot with purpose. That is where better photos begin.


Comments